Blades of Exile Scenario Editor
 |
 |
 |
FAQS concerning my VB version of the Blades of Exile Scenario EditorThis is my attempt to fix many of the problems I had with the Blades of Exile Scenario Editor. Unfortunately I did not have access to a C compiler, but I did have access to Visual Basic. I apologize to the MAC community, unless there is some way of running a Windows program on MAC. I had actually done the reverse engineering of the scenario files to build this application before Jeff Vogle had released the source code of his original work. I wrote this program for my own use, so please forgive the lack of some functionality that I never found useful. I have been wishing I could share it with the rest of the SW communitiy, since Jeff still has copyrights on the original work. Now that his code is open source, I feel free to share this with the SW community. I have uploaded my Visual Basic version of the Blades of Exile Scenario Editor here. Just unzip it into the same place as the original editor. I use a different filename so as not to over write the original program. I also have the Visual Basic source code available for anyone who is interested in using my ideas. Finally, I have both sets of graphics available; the Classic version with grey cave floors, and the Exile 3 set with the blue/green cave floors. And finally, I have a second version of the editor that produces a differently formatted database. This second version has the facility to dynamically allocate things such as Text, Dialog Nodes, Special Nodes, Monsters/NPCs, Items, Fields, and Special Node entry points. This second version is not compatible with the standard BoE game, but I am willing to share the concept in case anyone gets around to writing a game engine for it or for something similar. I also have a version 2 with an alternate scenario file structure that is more dynamic with respect to the number of objects that a town/area may have. The document describing the file structure is included in the EXSCENEDv2.zip file. I also have another page attached that you can see without having to download the zip file.
If anyone out there working on the now open-source code wants to pick up on my ideas and incorporate
them into the C++ code, please feel free. I haven't updated the help file that goes with it, but most of the help
from the original program still pertains here. The interface is heavily modified from the original version, but it
is more intuitive, at least to me.
The Full download is the prefered option but it is a bit large. Update: I have just gotten Code::Blocks installed with the MinGW compiler and wxWidgets. Let's see how long it takes to re-write this thing to C. 12.11.11: Apparently it's going to be a while until I can get a round tuit. I've just had a major load of work dumped on my desk, and I'm up to my eyeballs in database code.
This EXSCENED.zip file contains an entire directory exscened. To install this version simply unzip
the file into the BLADEXIL directory. Execute the ExScenEd.exe program. You can create a shortcut to this program
and add it to your Start menu. Also you may need to check the following things:
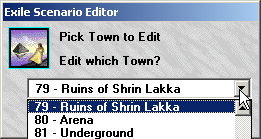
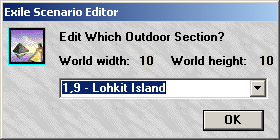
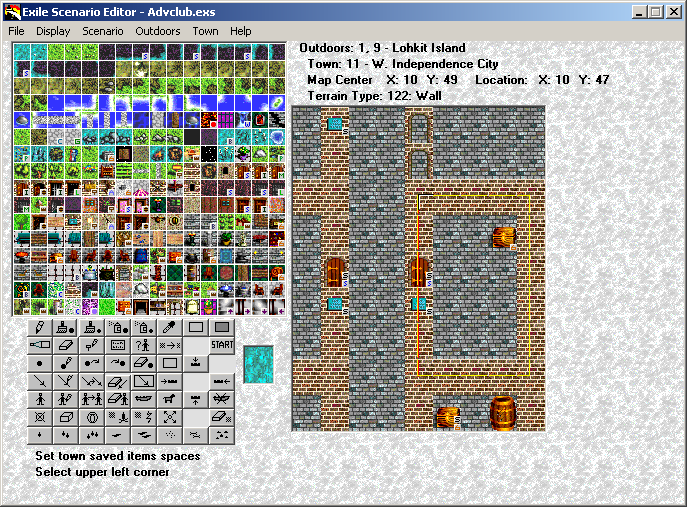
To edit the program, the Visual Basic project ExScenEd.vbp is in the EXSCENED folder. The source code is in the EXSCENED\ExScenEd folder. Also in the Documentation folder I have a Word document describing the .exs file as I had discovered it. While I have not developed any scenarios with this tool, I have used it to figure out other scenarios so that I could write complete walkthroughs of them. One of these walkthroughs, for "The Adventure Club", I sent to Gizmo to post on her "True Site for Blades". For a look see at how I used this version to work out the logic of the events, start ExScenEd.exe and open the Scenarios\Advclub.exs file. If you want, you can use the Display menu to resize your screen. (Don't worry, I will reset the screen resolution on exit. I have not been able to work out the resize form logic yet.) From the menu click Town > Edit Town Terrain. Use the numeric keypad to navigate Northwest until you see the Pedestal with Book and the special at location 21,21. (Another feature I never worked out was using the mouse to scroll the terrain screen. I always used the keypad since I had more control with it. Remember, I was just writing this program to fit my style.) On the tools in the lower left side of the screen, click the Create/Edit special tool, first button on the third row. Notice that if you hover the cursor over a button, the name of that button will pop up. Click on the book to look at the code associated with that special.
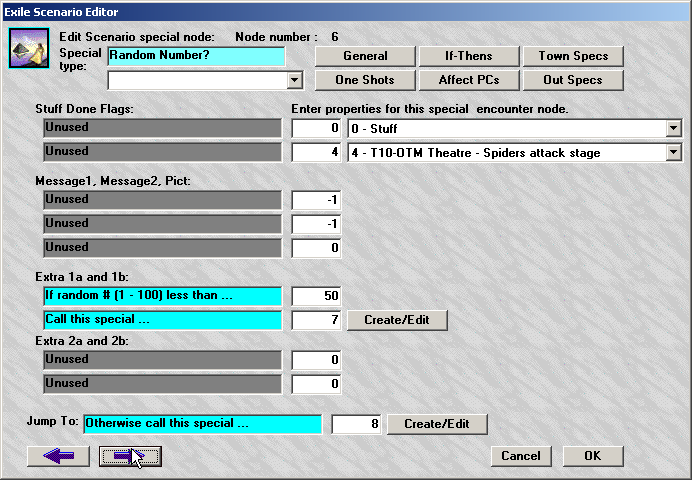
Here is the main reason I wrote my own editor.You will notice that I now have a description of the Stuff Done
Flags instead of just a number. I actually have an additional file in the Scenarios directory,
Advclub.exd, where I keep this information. You can actually edit the file in two ways: here in the editor,
or you can use a text editor such as notepad. You will find that I have changed a lot in the navigation, but I hope it is more intuitive. I was in the process of updating the Help file, but I was never really motivated to finish it. If any interest arises from this program, I can be easily compelled to complete the documentation.
Here is a list of features that I incorporated to make it easier to use the tool: (click on the thumbnails to see
the entire picture)
|


Feedback
You can find me on Spiderweb Forum
 or email me at hasen@flash.net
Please let me know if I missed or misspelled anything.
Copyright and Authorship Info
Avernum is copyright 2000-2011 by Spiderweb Software, Inc. - http://www.spiderwebsoftware.com, All Rights Reserved.
"Avernum" and "Spiderweb Software" are trademarks of Spiderweb Software, Inc.
Support shareware and register Avernum